[mod 3.8.x] Cyb - Advanced Registration 1.7
Для просмотра ссылки Войди или Зарегистрируйся Для просмотра ссылки Войди или Зарегистрируйся Для просмотра ссылки Войди или Зарегистрируйся Для просмотра ссылки Войди или Зарегистрируйся Для просмотра ссылки Войди или Зарегистрируйся
Для просмотра ссылки Войди или Зарегистрируйся Для просмотра ссылки Войди или Зарегистрируйся Для просмотра ссылки Войди или Зарегистрируйся
Info:
This product adds several advanced options to control new registrations, like:
- 'Random Questions' - User must answer random question to continue with the registration (can be on/off)
- 'Invitations System' - Let users invite their friends to join community
- You can choose to accept only invited people to register
- 'moderated users' management (accept/edit/contact/delete)
- e-mail users automatically when their accounts are accepted (can be on/off)
- 'non-activated users' management (accept/edit/contact/delete)
- Option to delete inactive accounts automatically if not confirmed X days after registration
All these features are controlled from one single page.
Notes:
- Don't forget to check/update product options after installation
- Only Admins can access this product options/logs
- Inviter is automatically marked as referral when invited user registers using invitation code
Installation:
1. Import XML file (as product

AdminCP > Plugin System > Manage Products > [Add/Import Product]
To set options:
Go to: AdminCP > vBulletin Options > Cyb - Advanced Registration
Versions:
v1.0 - Nov 29. 2008.
- Initial Version
v1.1 - Dec 08. 2008.
- New: Option to delete inactive accounts automatically after X days
- New: You can choose to e-mail users automatically when their accounts are accepted
- New: Enable only invited users to join
- Some minor bugs fixed
v1.2 - Dec 13. 2008.
- Fixed bug (Invitation e-mail address must be lower-case)
- Fixed bug (Random Question answer must be lower-case)
- Fixed bug (Unregistered users able to send Invitations)
- New: Limit number of Invitations user can send in 7 days
- Minor bug fixes in phrases and html
v1.3 - Dec 24. 2008.
- Improved detection of newly registered members who accepted invitations
- Fixed bug (referrer not marked if invitation code is not required)
v1.4 - Jan 02. 2009.
- Break lists into pages with standard vB navigation
- Code cleanup
v1.5 - Jan 25. 2009.
-Fixed bug (user can register without proper invitation code)
-New: Send multiple invitations at once
-New option: Maximum Invitations user can send at once
-New: Inviters are now able to add they real name to the message
-Minor bug fixes
v1.6 - Jan 25. 2009.
-Important bug fix in Invitation System
v1.7 - Feb 08. 2009.
-Fixed bug (Blank 'inviter' field for inviters who have been deleted in the meantime)
-Better inactive users detection for auto-prune (only zero-posters deleted)
-Fixed some CSS validation errors
-New: Check if e-mail address is already registered or invited before sending invitation
-Minor bugs fixed
Скачать:
[hak 3.8.x] UKBL Easy Vertical Menu System
Well you wanted Dropdowns and you got them, Now you want Vertical Menu's, Here they are
DEMO : Для просмотра ссылки Войди или Зарегистрируйся
Following on from the Easy Menu Tabs and the Quality Dropdowns, this is a new style of menu for sites that use side columns or even VBa
Done in a plain Neutral color scheme to compliment most sites you can change the color scheme by simply changing the hex color codes in the CSS part of the code.
This is suitable for ALL browser types
This example has sub menus within sub menus so you can see how to edit them to add more for your site
Firstly we need to Download the zip file, This has the code to edit plus related graphics, so you've downloaded the code,
Open the code in your fave Text Editor (Notepad is ideal for this )
Find in the code
PHP:
/*"""""""" Custom Rule""""""""*/
    ul#qm0 li .qmparent
    {
        background-image:url(http://www.ukbusinesslive.co.uk/forum/images/cssalt1_arrow_right.gif);
        background-repeat:no-repeat;
        background-position:97% 50%;
you will see referance to a gif, change the URL of the gif to where you are going to install your gif, Be it in your forums image directory or even photobucket, the choice is yours.
then find the other gif url here
PHP:
/*"""""""" Custom Rule""""""""*/
    ul#qm0 li:hover > a.qmparent
    {
        background-image:url(http://www.ukbusinesslive.co.uk/forum/images/cssalt1_arrow_right_hover.gif);
        text-decoration:underline;
    }
and do the same as the one above, change the above url to yours
Then find
PHP:
<!-- Add-On Settings -->
    <script type="text/JavaScript">

        /*******  Menu 0 Add-On Settings *******/
        var a = qmad.qm0 = new Object();

        // Item Bullets Add On
        a.ibullets_apply_to = "parent";
        a.ibullets_main_image = "http://www.ukbusinesslive.co.uk/forum/images/qtbordercaps_arrow_right_gray.gif";
        a.ibullets_main_image_width = 6;
        a.ibullets_main_image_height = 8;
        a.ibullets_main_position_x = -16;
        a.ibullets_main_position_y = -4;
        a.ibullets_main_align_x = "right";
        a.ibullets_main_align_y = "middle";
        a.ibullets_sub_image = "http://www.ukbusinesslive.co.uk/forum/images/qtbordercaps_arrow_right_gray.gif";
        a.ibullets_sub_image_width = 6;
        a.ibullets_sub_image_height = 8;
        a.ibullets_sub_position_x = -12;
        a.ibullets_sub_position_y = -2;
        a.ibullets_sub_align_x = "right";
        a.ibullets_sub_align_y = "middle";
and change the gif url to where you will upload your gifs
Then all you need to do next is upload the gifs from the zip file to the url that you made in the steps above
So thats the CSS part done, Next we need to edit our menu links, I've set the default to my forum but its easy enough to change them for yours or even if you want to add extra items, So lets start changing our menu links
First Find
PHP:
<li><a class="qmparent" href="javascript:void(0)" title="My Control Panel">My Control Panel</a>

        <ul>
        <li><a href="http://www.ukbusinesslive.co.uk/forum/profile.php?do=editavatar" title="Edit Avatar">Edit Avatar</a></li>
        <li><a href="http://www.ukbusinesslive.co.uk/forum/profile.php?do=editsignature" title="Edit Signature">Edit Signature</a></li>
        <li><a href="http://www.ukbusinesslive.co.uk/forum/profile.php?do=editoptions" title="Edit Options">Edit Options</a></li>
        <li><span class="qmdivider qmdividerx" ></span></li>
        <li><a href="http://www.ukbusinesslive.co.uk/forum/subscription.php?do=viewsubscription" title="List Subscriptions">List Subscriptions</a></li>
        </ul></li>
Thats our first block called "My Control Panel" all you need to do is edit these menu links to an url of your forum
PHP:
<li><a href="http://www.ukbusinesslive.co.uk/forum/profile.php?do=editavatar" title="Edit Avatar">Edit Avatar</a></li>
Don't forget once you've changed the URL, you can change the description, which you can find right at the end
">Edit Avatar</a></li>
Do that for all the links and by then you'll have your own Vertical Menu Tabs.
To see how the menu from a sub menu works, you need to find the Calendar Link in the Code
It starts like this
PHP:
<li><a class="qmparent" href="javascript:void(0)" title="Calendar">Calendar</a>
and then the menu links off from that, are similar to the menu links above, all together they look like this, showing the parent menu "Todays Post"
PHP:
<li><a class="qmparent" href="javascript:void(0)" title="Todays Post">Todays Post</a>

        <ul>
        <li><a href="http://www.ukbusinesslive.co.uk/forum/search.php?searchid=167" title="Todays Post">Todays Post</a></li>
        <li><a href="http://www.ukbusinesslive.co.uk/forum/search.php?do=getnew" title="New Post">New Post</a></li>
        <li><span class="qmdivider qmdividerx" ></span></li>
        <li><a class="qmparent" href="javascript:void(0)" title="Calendar">Calendar</a>

            <ul>
            <li><a href="http://www.ukbusinesslive.co.uk/forum/calendar.php" title="Calendar">Calendar</a></li>
            <li><a href="http://www.ukbusinesslive.co.uk/forum/calendar.php?do=add&type=single&c=1" title="Add Single Event">Add Single Event</a></li>
            <li><a href="http://www.ukbusinesslive.co.uk/forum/calendar.php?do=add&c=1" title="Ranged Event">Ranged Event</a></li>
            <li><a href="http://www.ukbusinesslive.co.uk/forum/calendar.php?do=add&type=recur&c=1" title="Recurring Event">Recurring Event</a></li>
            </ul></li>
Thats it Just save your code and upload it to the header or other section (side Colummns) of your forum or website
To change the colors of the menu to suit your site, simply change the hex color code at the begining of the CSS part of the code,
like using this hex editor for this
Скачать:
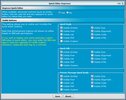
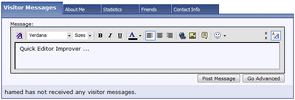


 То есть половина во фразах а половина в файлах. Так что если те фразы что в продуктах полностью переведены, то то что в файлах возможно переведено не все, по причине - банально не заметил




 AdminCP > Plugin System > Manage Products > [Add/Import Product]

